Friday, December 30, 2011

Holiday Cheer

While visiting my parents for the holidays I decided to try a new holiday recipe -- peppermint bark.  I love peppermint and chocolate so I thought this would be the perfect dessert.  I made a batch and it was devoured by visiting relatives..... when I left my parents house there was not a single piece left.  I'd say this was a success!  I look forward to making it next year. 

Peppermint Bark with a Dark Chocolate Center

20 ounces white chocolate, coarsely chopped, divided
30 peppermint candies, crushed, divided
10 ounces dark chocolate, coarsely chopped
6 tablespoons heavy cream
1 teaspoon peppermint extract

1. Line a 9x12 baking pan with aluminom foil or parchment paper.

2. Melt half of the white chocolate in the top of a double boiler.  Stir frequently and scrape down the sides to make sure nothing sticks.  Spread white chocolate into prepared pan.  Sprinkle with the "dust" of the crushed peppermints.  Let chill in fridge for about 15 minutes.

3. Melt dark chocolate, heavy cream, and peppermint extract in the top of a double boiler.  Stir frequently until just melted.  Quicky pour over chilled white chocolate layer.  Spread evenly.  Chill in fridge until firm.  (I did mine for about 25 minutes).

4. Melt remaining white chocolate in the top of a double boiler.  Stir frequently and scrape down the sides.  Spread white chocolate evenly over chilled dark chocolate layer. Sprinkle larger bits of peppermint on top of melted white chocolate.  Chill in fridge for 15 minutes. 

5. Break into small pieces.

Bon appetit!

Crush the peppermints in the wrapper.

First layer of white chocolate and peppermint dusting.

All put together in the pan


Wednesday, December 21, 2011

Fish Sauce

This is the fish sauce I used in the Thai Pineapple Curry and Rice recipe. You can find fish sauce in most grocery stores.  Look in the International/Asian food aisle.  I bought mine at Kroger.

Tuesday, December 20, 2011

Deliciously sinful mashed potatoes

Everybody knows how to make the standard mashed potato dish -- boil up potatoes and mash with butter, salt, and milk.  This is a sensational twist on the standard classic..... but make sure you get in your exericse before indulging in this side dish!

Mashed Potatoes

3 large russet potatoes, peeled and cubed
1/2 stick butter
1/3 cup sour cream
1/4 cup buttermilk
1/2 tablespoon black peppercorns
3-5 whole cloves of garlic
2 large fresh rosemary sprigs

1.  Put all dairy products (butter, sour cream, and buttermilk) in a dish and allow to come to room temperature.

2.  Fill large pot 2/3 full of salted water.  Add peppercorns, whole cloves of garlic, and rosemary sprigs.  Bring to a boil.  Once boiling, remove the rosemary sprigs and add potatoes.

3. Boil potatoes until very, very soft.  Drain and put back in large pot, garlic and peppercorns still included.  Let sit and steam for 5 minutes.

4. Add dairy ingredients and mash together.  YUMMO!!!

Bon appetit!

Thai Pineapple Tofu Curry and Rice

This recipe is one of those recipes that tastes great the 'night-of' but also tastes fantastic as leftovers.  This makes it a winner in my book! 

A few side notes:  The original recipe calls for 1/4 cup red curry paste.  If you bought it at a specialty grocer you probably have ready to use or prepared curry paste, in which case a 1/4 cup will result in very mild and subtle flavor. But if you bought it at the supermarket, you probably have "concentrated" curry paste, in which case, 1/4 cup is way TOO MUCH. Check your label. This is the reason for only 1-2 tablespoons of curry paste in my version.  Also, if you want a slightly thicker sauce, mix together 1 tablespoon corn starch or flour with 1 tablespoon water and add to sauce near the end of cooking.  And, the original recipe calls for 2 cans of coconut milk but I felt that was too much.  BUT.... I always end up wanting just a bit more sauce, so maybe the perfect amount is 1 1/2 cans?  Play with it.  That's the joy of cooking!    

Thai Pineapple Curry with Rice

2 cups uncooked jasmine rice
1-2 tablespoons red curry paste
1 (13.5 ounce) can coconut milk
1/2 package Tofu, extra firm, cubed (or chicken)
3 tablespoons fish sauce
1/4 cup white sugar
bunch of sugarsnap pease (the more, the better in my eyes!)
1/2 red bell pepper, julienned
1/2 green bell pepper, julienned
1/2 small onion, chopped
1 cup pineapple chunks, drained

1.  Cook jasmine rice according to package direction. 

2.  Heat 1 tablespoon oil in a wok.  Sautee the red curry paste for a few minutes.  This will help activate all the flavors of the spices.  

3.  After red curry paste has been on the heat for a few minutes, whisk in coconut milk, fish sauce, and sugar. Bring to a boil, and cook 15 minutes.

4.  Mix the sugarsnap peas, red bell pepper, green bell pepper, and onion into the wok.  Continue cooking 10 minutes, until peppers are tender.  Remove from heat, and stir in pineapple.  Serve over the cooked rice.

5.  I prepared the tofu in a separate pan.  You can either sautee in EVOO or fry in vegetable oil.  I did the frying in oil method.  If you choose to use chicken, add chicken with red curry paste in the very beginning.  Once the chicken has cooked 3/4 through, then add the coconut milk, etc. 

Bon appetit!

Fried tofu.

Curry sauce.

Final plating.  YUM!


Thursday, November 24, 2011

Rendering of the Fat

I enjoy learning new cooking techniques.  After telling a friend that I chose duck as my main dish for my Thanksgiving feast, she promptly told me I "HAD to render the fat."  Huh?!?!???  I researched online how to render the fat and after reading pretty much the same thing on each website and in my cookbooks, I went ahead with the process.  I documented the process with my camera just for you guys.

Plus, it amuses me to have an entire post dedicated to the rendering of fat.  Enjoy. 

(Ahhh.  It just occured to me why it is so amusing to me to talk about the fat.  It springs off of a hysterical episode of "Friends."  Go watch it.)

Ingredients:
Duck fat and skin (as much as possible from the bird)
1/2 - 3/4 cup water

1. Remove as much as possible of the skin and fat from a duck.  Cut it into smaller pieces. Place it in a skillet or pot.

2. Add water so that it is about halfway up the sides of the fat.

3. Set burner to a low setting and let simmer for 60-90 minutes (mine took the full 90 minutes).

4. When it starts to look as though the simmer is dying down, watch the fat carefully. It should be a warm golden color, with smaller bubbles. As the water evaporates, those bubbles will come closer to a boil and the remaining liquid will turn a darker golden. Eventually, the boiling bubbles will suddenly become much smaller, just back to a bare simmer, which means all the water is gone.

5. Remove it from the heat immediately and pour the fat through a fine mesh strainer. Let cool to room temperature, transfer to a glass jar and place in the refrigerator for 1 month or the freezer for 6 months.

6.  Apparently, you can save the cripsy pieces of skin, commonly referred to as "cracklings."  You can use them as toppings, an ingredient to breads, and other things.  I kinda, sorta, maybe snacked on them plain -- it was a small piece of fried, greasy heaven.  I don't know if I'll use the remaining amount in anything, but I'm going to save them until I research recipes before tossing them (but no more snacking!).

1 pound fat = 1 cup rendered fat, roughly

The start of the process

20-30 minutes in.... you can see the magic starting to happen.

Rendered fat and the leftover "cracklins"

A Thanksgiving Feast (for one)

Happy Thanksgiving everybody!  I trust that you all went along with the theme of this blog and "stuffed" yourselves with great food and have plenty of leftovers to look forward to throughout the long weekend. 

Today was my first Thanksgiving holiday in the states in 5 years.  I spent my morning running an 8 mile Turkey Trot race throughout downtown Dallas with thousands of other runners.  At the packet pickup yesterday I asked how many runners were expected to show up and they said that registration was at its highest ever -- over 36,000 runners.  WOW!  It felt great to get my run in early in the day and to have it fit so convieniently with my current training plan (I was supposed to run a 7 mile tempo... why not go ahead and make it 8?!!). 

I then spent the entire day cooking, cleaning, and more cooking... and then finally eating!  My Thanksgiving feast included:

simple roasted duck
mashed potatoes
baked yams
stuffing

I'll be writing the recipes for the duck and potatoes later tonight or tomorrow.  Enjoy the rest of your holiday break!

I'll be enjoying my leftovers for the next several days.

Wednesday, November 23, 2011

Future Possibilities

A preview of what is (hopefully) to come:

*Homemade Chicken Noodle Soup
*Bake Ziti
*Vegetable Couscous
*Spaghetti and Meatballs
*Thai Pineapple Curry and Rice
*Zucchini Boats
*Acorn Squash
*Peach Cream Pie
*Breaded Buttermilk Chicken
*Amazing Mashed Potatoes

*and I bought a duck for my Thanksgiving meal.  Once I choose which recipe I'm going to try, that will be added to the list. 

I never thought I would be this busy with work.  I get home from 10 hour days and am exhausted.  It's unbelieveable how much extra work there is for lessons, teaching, my own practicing, plus the cooking, shopping, cleaning, running, dating, etc... Ugh.  I'm just busier now than I was when I started the blog.  I hope to find a balance soon. 

With Thanksgiving holiday here, I'm trying to figure everything out and hope to get some of these recipes posted!

Thanks for the love and support.  It makes me feel good (and bad, at the same time) to receive emails and facebook messages requesting my time and effort into this blog!  I'll try not to let you down! 

Saturday, October 1, 2011

Fancy Appetizers

How could I forget to post this recipe??!?  I've had this blog for 9 months now and have failed to share with you one of my top entertaining recipes.  Shame on me!!!!

Busy evening here in Dallas -- poker night!  I decided to bring some type of appetizer and was debating on 3 recipes I've already posted here (stuffed mushrooms, avocado salsa, and......  )  OH MY!!  I just realized that I haven't shared another tasty recipe with you guys.  I have a great 7 layer dip that my mother gave me and I tweaked just a bit.  Well, well, well.  I've got to stop slacking!

Anyways, I started thinking about what would be great to bring this evening and realized that my spinach artichoke dip would be perfect!  I started making it in Mexico, but couldn't make it a lot because all the ingredients were pretty expensive down there.  Most people love this dip, so I hope it won't fail me tonight!  I'm also excited to try it with fancy artisan breads (another thing one could not find in Mexico).  One bummer -- I thought it would be cheaper to make here in America, but it's still a fairly expensive dip.  But it's worth it!!!

I've played with this recipe a lot.  You can skip roasting the garlic if time is running short.  Always use fresh spinach.  The frozen stuff isn't as good in this dip.  Use good cheese.  Salt and pepper isn't absolutely necessary -- I forget it half the time, but I suppose it does add something to the dip.  meh. 

Spinach Artichoke Dip

5 cloves garlic
1 package fresh spinach (10 oz.)
1 can artichoke hearts, drained and chopped
1 can alfredo sauce
1 cup shredded mozzarella cheese
1/2 cup grated fresh parmesean cheese
1 package cream cheese, softened
salt, pepper

1. Preheat oven to 350 degrees.  Cut off the top of a head of garlic so that each clove is exposed.  Sprinkle some EVOO, salt, and pepper on the head of garlic.  Place in a aluminom foil tent and roast for 20-30 minutes.  Let cool to touch and then squeeze the softened garlic cloves from their skins.  Use about 4-6 cloves.

2. Using a food processor, chop the spinach and artichoke hearts. 

3. Mix chopped spinach, chopped artichoke hearts, alfredo sauce, mozzarella cheese, parmesean cheese, cream cheese, salt and pepper to taste, and minced roasted garlic cloves in a large bowl.  Make sure everything is mixed together well.

4. Pour dip into a baking dish and bake for 35-40 minutes, or until bubbly, warm, and delicious. 

5. Serve with bread or tortilla chips. 

Bon appetit!

(I forgot AGAIN to take a picture before digging into this wonderful dip.  I'll try and remember next time!)

Tuesday, September 20, 2011

Soup, soup, soup!

I finally have found the inspiration to post another blog -- the perfect recipe!  While I've been making some new dishes since living in Dallas, I haven't found anything that I've particularly fallen in love with.  That all changed tonight. 

About two weeks ago I decided to try a new soup recipe.  The ingredients sat in my kitchen for weeks while I neglected the stove, this blog, and my own joy and satisfaction from cooking was a fond but distant memory.  As I drove home from work tonight, I chose to cook instead going for a run.... and boy, I'm glad I did!

I assume the butternut squash I used was still fresh even though it had been untouched since coming home from the grocery store weeks ago.  (oops).  This soup is EASY-PEASY.  I wasn't even sure I would like butternut squash, but since I know I enjoy eating other squash, I thought this recipe was something worth trying. 

Next time I make this, I'm going to try roasting the squash in the oven for 40 minutes with olive oil, salt, pepper, and garlic.  And I might add an extra 1/2 cup or so of chicken stock.  After adding in the cream cheese, it thickens up a bit, so the extra liquid might help it out.  I'm excited to try this soup tomorrow after the flavors have blended together overnight.  Yum!

Enjoy!

Butternut Squash Soup

6 cups peeled and cooked butternut squash (about a 2 lb squash)
3/4 medium yellow onion, chopped
4 tablespoons butter
1/2 teaspoon dried marjoram
1/4 teaspoon cayenne pepper
1/4 teaspoon paprika
1/2 teaspoon black pepper
3 cups chicken stock
8 ounces philadelphia cream cheese

1. Cut butternut squash in half and scoop out seeds.  Place cut side down on plate and microwave 8-10 minutes.

2. Let squash cool to touch and then peel away skin and cube.

3. In a large pot over medium heat, sautee onions with butter until tender.

4. Add in cubed squash, dried marjoram, cayenne, paprika, black pepper, and chicken stock.  Bring to a boil and simmer for 12-15 minutes.  Squash should be fully cooked and tender by now.

5. Puree squash soup and cream cheese in a blender or food processor. 

6. Return to pot to slightly warm again.  Do not let boil.

Bon appetit!!!!

Everything in the pot before I stirred it up.  Such pretty fall colors.

Butternut squash soup!

Thursday, July 28, 2011

Best Brownies EVER

Having eaten a lot of homemade desserts at my friend Nicole's house, I know that making things from scratch is the way to go.  This brownie recipe is from scratch --- and let me tell you --- no more boxed brownie mixes for me!!!  This recipe is fantastic and a chocolate lovers delight.  Enjoy!

Brownies

8 tablespoons butter
4 ounces unsweetened chocolate, chopped
1 1/2 cups sugar
2 teaspoons vanilla
2 large eggs
1 cup flour
1/2 cup chopped nuts (pecans, walnuts, etc)

1. Preheat oven to 400 degrees.  Grease and 8x8 baking pan. 

2. In a large saucepan over low heat, melt butter and chocolate.  Stir constantly.

3. Remove from heat and stir in sugar, vanilla and eggs (one at a time).  Blend in flour and walnuts.

4. Spread in pan and bake 18-20 minutes.  (Both times I've made this, they've been done at the 18 minute mark).


Frosting

6 tablespoons butter
1/4 teaspoon vanilla
2 1/4 cups confectioners sugar
1/2 cup unweetened cocoa powder
3-4 tablespoons milk

1. In medium bown with an electric mixer, beat butter and vanilla until creamy.

2. At low speed, gradually add confectioners sugar and cocoa.  Alternate with milk, beating well after each addition until frosting is smooth and fluffy.

3. Apply frosting when brownies are cool. 

Bon appetit!!!!


Monday, July 25, 2011

Sushi

My newest obsession:  homemade sushi rolls. 

I have been missing this for years while living in Mexico!!  I finally bought a bamboo mat to roll my own sushi and I am so happy.  Below is the (modified) recipe that I chose for the sushi rice.  The bag of rice I bought suggested making at least 2 cups of rice for "best results".  I knew I would end up with a lot of cooked rice, but I wanted to make sure that my first time making it was good.  My friend said she usually makes 3/4 cup of uncooked rice when making 2 rolls.  The recipe below is for the 2 cups. 

Sushi Rice

2 cups uncooked sushi rice
3 cups water
1/3 - 1/2 cup rice vinegar (use the larger amount if you want a more vinegar taste, use the lesser amount if you don't)
1/4 cup white sugar
1 teaspoon salt

1. Rinse rice in a colander or strainer under water.  Rinse until water runs clear. 

2. Combine rice and 3 cups water in a medium saucepan.  Bring to boil, then reduce heat to low.  Cover and cook on very LOW for 20 minutes.  (I stirred mine occasionally even though the recipe didn't mention it to make sure it didn't burn on the bottom of the pan).

3. In another small saucepan, combine rice vinegar, sugar, and salt.  Cook over medium heat until sugar dissolves.

4. Let both rice and vinegar mixture cool. 

5. Stir vinegar mixture over cooked rice.  When poured over the rice, the rice will seem very wet.  Keep stirring and the rice will dry as it continues to cool. 
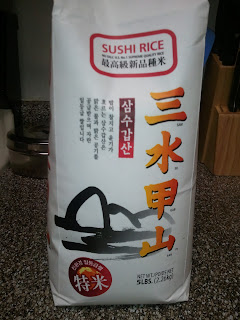
Large bag of Sushi rice from the local Asian store.

Cooked sushi rice with seaweed behind it.

Yummy avocado and rice sushi rolls!  It is so simple but it tastes great.


Sunday, July 24, 2011

Living the new life.... and loving it!

I'm finally settled in my new apartment!  Most of the boxes are gone; I have lots of organizing to do still.  My horn studio got set up first, then the kitchen..... you can tell where my priorities lie!  I LOVE my new apartment.  Literally everything about it is exactly what I was looking for.  I thought I'd show some pictures of the kitchen.  Look back at one of my earliest posts about my kitchen in Mexico to compare. 
I would like to point out these AWESOME facts about my kitchen:

1. I have a dishwasher.  Never in my life have I had a dishwasher.  I even had to ask my friend how to operate it. 

2. I have a microwave. 

3. My freezer makes its' own ice.  How cool is that?!??  I didn't know a fridge/freezer could do that when it doesn't have the water/ice in the door. 

4. I have a double sink.  YAY. (although, with the dishwasher, I'll probably be using the sinks less....)

5. While my kitchen is still the galley-style, I do have much more storage and countertop space.  It feels very big to me.

6. I love the little bar area above the sink.  It opens up into the living room area. 


Saturday, June 25, 2011

Rice and Grains, Part II

If you liked the rice pilaf recipe, then I bet you will like risotto.  Risotto is one of the most popular ways to prepare rice in Italy.  Normally, a special type of rice, called arborio rice, is used.  Arborio rice is a short-grain rice that becomes slightly creamy and chewy when cooked properly.  The slow addition of liquid during the cooking process and the constant stirring does something to the starches that makes it so creamy and delicious.  I don't know all the specifics so I'm not even going to try to explain. 

I had been wanting to make risotto in Mexico for a long time.  The only type of Arborio rice that I had found was one certain brand that I had many previous problems with (getting lots of bugs in the boxes of rice), so I never ended up buying the specific rice.  After waiting months and seeing more and more risotto recipes, I finally decided to try it using a standard long-grain rice.  It came out great!  I just made this recipe again for my parents; this time using Arborio rice.  Although it came out great the first time, I could tell a difference with the arborio rice.  Since I knew that I wanted to use arborio rice in other dishes, I didn't have a problem buying the box of it.  If you're not so sure about it, you can always try the dish like I did the first time.  (I hope that doesn't make me "less of a chef" ... saying that it's okay to not use the "right" type of rice... hmmmm). 

Mushroom Risotto

(This is the suggested recipe for 3 servings.  This makes 3 very large servings.  One serving of rice is said to be 1/4 cup, but that always seems like soooo much.  Just a warning note.) 

3 cups chicken broth, divided
2 tablespoons EVOO
1/2 pound sliced fresh mushrooms, such as a mixture of white (button), portobello, or cremini
1 shallot, diced
3/4 cup Arborio rice
1/2 cup white wine
salt and pepper to taste
2 tablespoons finely chopped chives
1-2 tablespoons butter

1. In a saucepan, heat all of the chicken broth over medium heat.  Start this once all vegetables are chopped and other ingredients are ready on counter.

2. In a large saucepan warm the EVOO over medium-high heat.  Add mushrooms and cook until softened, about 3 minutes.  Remove mushrooms and all their liquid; set aside for later. 

3. In the same saucepan that you cooked the mushrooms in, add another splash of EVOO and cook shallots a few minutes.  Add the arborio rice and stir to coat with oil and shallots.  When the rice has taken on a pale golden color (you will know!!), pour in the wine.  Stir constantly until all the wine is absorbed. 

4. Now starts the hard part. 

5. Once the wine has been fully absorbed, add 1/2 cup of the warmed chicken broth to the rice.  Stir until broth is completely absorbed.  Stir constantly.  Continue adding 1/2 cup of broth at a time to the rice, stirring continuously, until all liquid has been absorbed and rice is al dente.  This process can take about 15-20 minutes.  Your arm might start to get sore. 

6. Remove from heat and stir in the mushrooms and their liquid, the chives, and butter.  Mix together until butter melts.  Season with salt and pepper.

Bon appetit!

Thursday, June 23, 2011

Rice and Grains, Part I

Every meal needs a healthy side dish (other than the obvious vegetable).  I've started to explore the rice and grains food category.  Rice, couscous, and quinoa all make excellent side dishes that each have their unique texture and flavor.  Over the next several posts, I'm going to write some of my favorite rice and grains recipes.  I hope everybody enjoys this mini-series.

Rice Pilaf
2 tablespoons butter
2 oz. broken uncooked spaghetti noodles
1/4 of medium onion, chopped
2 cloves garlic, minced
1/2 cup rice
1 cup chicken broth (or vegetable broth)
salt and pepper to taste

1. Melt butter in a medium saucepan over medium low heat.  Add broken pasta noodles and brown.  Watch this step carefully. 

2. Add onion and garlic and sautee until softened.  Add the rice and mix thoroughly to coat the rice with the butter mixture.  Toast the rice a few minutes, stirring often. 

3.  Add the chicken broth, salt, and pepper.  Cover.  Let sit over low heat for 15-20 minutes.  Make sure the rice doesn't start to burn on the bottom of the pan.  I stir every so often to avoid this.  And, after the rice plumps up, you can always turn off the burner but keep the lid on it to continue the cooking process without burning.  If I turn off the burner, it is usually around the 15 minute mark.

To turn this into a nice vegetable dish, mix in 1 inch pieces of asparagus or diced zucchini at the same time you add in the chicken broth.  I add another splash of stock (about 1/4 cup), too. 

Bon appetit!

Rice pilaf with zucchini still in the saucepan

Rice pilaf and one of my favorite pairings -- honey rosemary chicken

Wednesday, June 22, 2011

The Sauce

As requested, here is the homemade honey mustard dipping sauce that accompanies the breaded chicken tenders.   Biggest key step for this recipe is to make it the night before you want to use it.  It becomes so flavorful by letting the ingredients marry together overnight.


Homemade Honey Mustard Dipping Sauce

1/2 cup mayo
2 tablespoons prepared yellow mustard
1 tablespoon dijon mustard
2 tablespoons honey
1/2 tablespoon lemon juice

1. Mix all ingredients together in a bowl.  Cover and chill in refrigerator overnight.

Bon appetit!

Back Home Again

This has been a couple of emotional, life changing weeks.  I had expected to be back on blogging track but new challenges kept coming at me.  For the most part, things are calming down and I hope to be blogging on a regular basis from here on out. 

I have made it safely to the United States for my summer vacation.  I'll be spending my time at my parents house in Indiana.  I'm extremely excited to be cooking in a large kitchen with all ingredients quickly at hand.  I'm also excited to be sharing some of my favorite recipes from this site with my parents.

I started this blog because I was amazed and shocked at the quality of meals I could prepare with such limited ingredients while living in Mexico. The excitement of each successfully attempted recipe was exhilarating and has gotten me completely, 100%, head over heels obessed with all things food related. I can spend hours researching recipe websites, browsing other food blogs, and viewing pictures of exquisitely plated food.

Not only am I here in the US on vacation, but I have also decided to permanently move back to the country.  I drove through Mexico for the last time last week and am so blessed to have had such an amazing 4 years down there.  All of this means that I am excited to start the next phase of my cooking journey. I can only begin to imagine what will be cooking in the kitchen over the next year. All the correct ingredients, the best cooking and baking equipment, an accurate oven thermometer, etc..... I'm sure it will feel like a dream at first.

Also recently changed, I will be cooking solo for awhile. It will be strange to go back to cooking for only one person rather than two. I know that many meals will be leftovers so I will not be going through as many new recipes as I have in the past months. I hope to try one new, exotic dish each week so that I have at least one blog post for the week. And for all you meat lovers out there..... with no man around the house, I imagine that most of my dishes will be going back to vegetarian. Feel free to substitute (for tofu) or add chicken, pork or beef whenever you feel like it.

Much love to all my readers!! I appreciate all of you!

Monday, June 6, 2011

A quick announcement to say that I've updated the "List of Recipes" page.  You can find all the recipes that I've posted on this blog easily through that page.  I got out of the habit of always updating that page after a new post and will try to change that. 

Enjoy!

Sunday, June 5, 2011

A new favorite

Don't you love finding a new recipe that everybody devours and loves?  This next recipe is relatively new to us but it has already been repeated several times.  Homemade breaded chicken tenders!  YUMMY!

I have made these to be the main (and only) dinner dish, and then used the leftovers the next day in a chicken wrap or placed over salad greens.  The ideas are endless!

Please remember that when I cook, I almost always make enough for two people, and then some for leftovers -- I guess that makes about 3-4 portions.  This recipe is soooooo good that using 4 chicken breasts tests our temptation limits on getting seconds.  4 chicken breasts, depending on size, should be enough for 3 portions.  (It also depends on what you are serving with this for the meal). 

Breaded Chicken Tenders

4 boneless, skinless chicken breasts, cut into strips
1 egg, beaten
1 cup buttermilk***
1 1/2 teaspoons garlic powder
1 teaspoon paprika
1 teaspoon
1 cup flour
1 cup bread crumbs
1/2 teaspoon salt
1 teaspoon baking powder
vegetable oil to fry

***There is no buttermilk in Mexico.  I let 1 cup milk and 1 1/2 tablespoons white vinegar sit for 5 minutes and then continue with the recipe.  Tonight I used lemon juice instead of white vinegar and I actually liked the taste even better.  I imagine with plain buttermilk the flavors will be similar. 

1. Mix egg, buttermilk, garlic powder, and paprika.  Pour over chicken strips in a ziplock bag.  Refrigerate at least 4 hours and up to 24 hours. 

2. Combine flour, bread crumbs, salt, and baking powder.  Mix well.

3. Take each chicken strip out of the buttermilk marinade and place in the flour mixture.  Coat each chicken strip well and place on a plate until ready to fry. 

4. Heat oil to 375 degrees (190 C)

5. Fry chicken strips until golden brown, about 10-12 minutes.  This usually takes 2-3 batches. 

Bon appetit!


Thursday, May 26, 2011

Gnocchi

What an adventure.  Somehow I got the idea to make homemade potato and riccota gnocchi.  I searched websites for recipes, tips, and ideas and found a very appealing recipe on food52.  I got Shea to agree to help with the preparation. 

In the reviews of the recipe, several people mentioned to double the recipe so that you make a lot and then freeze half of it for a later meal.  I decided to double the recipe.... and got a MOUNTAIN of gnocchi balls.  Shea and I stood in the kitchen for 3 hours making the dough, rolling it out into snakes, then rolling into balls.... THREE HOURS.  We most definitely got our leftovers!  I would suggest to those of you who want to try this recipe to NOT double it on the first try.  It is a lot of work. 

With all the work and time spent in the kitchen for this recipe, I must admit that it is great.  Excellent.  Quite tasty.  And when the frozen gnocchi gets cooked, it tastes just as fresh as the first batch.  I have served this with pesto and also served plain. 

Ricotta and Chive Gnocchi (serves 4-6)

3 Russet potatoes
2 Eggs
1 c. Ricotta
1/2 c. Grated parmesan
1/3 c. Chives
2 c. Flour (making sure you have extra on hand for rolling them later)
6 T. Butter
6 T. Olive oil                                                                                                   
Kosher salt & pepper
  1. Bring a large pot of water to boil and add the russet potatoes. Boil for 45 minutes, draing the water through a colander, and let the potatoes cool.
  2. Once the potatoes have cooled down, remove and discard the skins. In a large bowl, mash the potatoes. The mixture needs to be as smooth as possible, so use an immersion blender or hand mixer if that helps. Then, add the eggs and stir into the mixture. Once the eggs have been incorporated, stire in the ricotta, parmesan, and chives.
  3. At this point, the mixture should be very thick, but it needs to be as thick and maliable as dough. Add the flour and stir together until you get that consistency. The mixture will still be a little sticky, that's ok. Take a handful or two of flour and scatter it on a smooth surface. Place your dough on the flour and roll around until it's more dough-like and doesn't stick to everything in sight.
  4. Begin rolling with your hands as if you're forming a large snake. You will end up getting a very large tube of dough, about two feet long. Cut this into quarters, and continue rolling each individual segment until you form rolls that are no bigger than a quarter in circumference. (Any bigger and you'll have difficulty cooking them.)
  5. From the skinnier rolls, take a knife or pinch off little sections and roll them around in the palm of your hand to make the gnocchi. You may need to continue dredging them in a little flour as you go, which is fine. Set all the finished gnocchi on a large plate to the side.
  6. Once all the gnocchi have been formed. Dump them into a boiling pot of hot, salted water. Boil the gnocchi for five minutes to ensure their centers are nice and dense. (They will automatically start popping up to the top of the pot once they're cooking, but make sure you give them a little extra time in the water.)
  7. Drain the boiled gnocchi through a colendar. Then, in a very large saute pan over medium high heat, add two tablespoons of oil and butter. Add just enough gnocchi to the pan where they have enough space to get a light, brown crust around them. Add more oil, butter, and gnocchi when the first batch is done. Lightly season the gnocchi with a little kosher salt, parsley, or extra chives.

A mountain of rolled gnocchi. 

Cooked to perfection.

Curried Chicken Salad

On a hot summer day this sandwich filling is fantastic!  The recipe is so simple that it makes me feel silly for not having thought of it before.  Such a lovely dish. 

Curried Chicken Salad

2 cups cubed, cooked chicken
1 medium red apple, skin left on and cubed
3/4 cup dried craisins
1/2 cup celery, thinly sliced
1/4 cup pecans or walnuts, chopped
2 tablespoons green onions, chopped
1/2 cup mayo
1/2 cup plain yoghurt
2 teaspoon lime juice
1 teaspoon curry powder

1. In a large bowl combine chicken, apple, craisins, celery, pecans, and green onions.  Toss together.

2. In a separate bowl, mix mayo, yogurt, lime juice, and curry powder. 

3. Add mayo mixture to chicken mixture and toss well to coat completely.  Chill for two hours and serve.

Bon appetit!

Wednesday, May 18, 2011

My dear family and friends,

It has been a BUSY month!  I feel like I've barely had any time to cook great meals, let alone blog about them.  I just thought I would let everybody know that I'm not quitting the blog.  I will write some more recipes very soon!  Shea and I just tried a new curried chicken salad that was fantastic and I can't wait to share it with everybody! 

I've been extremely busy with orchestra auditions and work.  I've got my last audition in about two weeks, and once that is finished, I hope to be blogging again on a regular basis. 

Until then.......  I will add recipes when possible. 

Friday, April 29, 2011

Ch-Ch-Ch-Chimichanga

The chimichanga is one of the greatest Tex-Mex foods that has come into existence.  As a child dining out with parents at Mexican restaurants, I would always order the chimichanga.  When I moved to Mexico, I was a little shocked that chimichangas weren't really a 'real' food down here (although a quick Google search about the history of chimichangas says that they exist in the Mexican states of Sonora and Sinaloa (Sinaloa is the state in which I live)).  I quickly learned that all the "authentic" Mexican restaurants that I had visited in the USA were not good representations of Mexican food.  Don't even get me started on Taco Bell.  After a few years living down here, you start to miss the Tex-Mex foods.  Crazy, I know, but it's true.  I researched some chimichanga recipes and ended up combining a few to create this recipe. 

Shea and I make about 9 or 10 chimichangas each time.  We freeze the ones we don't need that night (assemble each one, just don't bake).  They taste so good and are such a quick thing to pop into the oven on busy days.  They're even better than the frozen entrees you find in grocery stores!  Try it next time you want some Tex-Mex!  Oh, Shea adds some jalapenos to the ones he makes. 

Chimichangas (yield: 8-10)

1 pound ground beef
1/2 medium onion, chopped
1 small can corn, drained and rinsed
1 1/2 - 2 cups salsa (I use part enchilada green salsa and part red salsa)
2 teaspoons chile powder
1 teaspoon garlic powder
1 teaspoon cumin
2 cans refried beans
shredded cheese
8-10 large flour tortillas

1. Preheat oven to 350 degrees.  (I usually light the oven when I am done browning the beef.)

2. In a large skillet brown ground beef.  Drain grease.

3. Add onions and corn and cook until onions are tender. 

4. Stir in salsas, chile powder, garlic powder, and cumin.  Heat through. 

5. Assemble the chimichangas.  Place a layer of refried beans on tortilla,  Add small portion of beef mixture in the center.  Top with shredded cheese.  Fold sides inward to create a rectangle/square thing that resembles the chimichangas you have seen before.  =)  At first, I used extra refried beans to act as a glue to hold it together, but have changed to using toothpicks.  Either method works fine. 

6. Place chimichangas on baking sheet, seam side down. 

7. Bake 30 minutes, turning half way. 

Bon appetit!

Saturday, April 23, 2011

Grillmaster

Here is the recipe that saved us yesterday!  I had already planned on having kabobs on the grill and had already been marinating the chicken and veggies all day.  I had planned on having rice alongside to complete the meal, but we were so pleased with the flavor that we didn't miss it. 

I made two portions of the marinade.  One for the chicken and another for the veggies.  I marinated everything in separate ziplock bags for 24 hours.  I soaked my wooden skewers in water for about 4 hours to make sure they didn't burn.  I did not marinate the mushrooms -- I wasn't sure if they would hold up to being soaked in liquid for a long period of time.  Comments on this????? 

Chicken and Veggie Kabobs Marinade

1/4 cup vegetable oil
1/3 cup honey
1/3 cup soy sauce
1/4 teaspoon black pepper
2 garlic cloves, minced

3 chicken breasts, cubed
1 green bell pepper
large handful of cherry tomatoes
1/2 package of button mushrooms
1 onion, quartered with stem left in tact
3 rings of sliced pineapple


1. In a large bowl, whisk together the vegetable oil, honey, soy sauce, black pepper, and minced garlic cloves. 

2. Pour into a large ziplock bag.  Add cubed chicken and vegetables.  Marinate in refrigerator up to 24 hours.

3. Save a little bit of the vegetable marinade to baste over kabobs during grilling process.


Marinated kabobs fresh off the grill

I took some pictures of tonights meal, too.  I guess we will be using the grill the whole weekend!  Tonight we went freestyle and had some portobello "burgers" with a vegetable medley of zucchini, mushrooms, cherry tomatoes, and bell pepper.  It was delicious!  

Shea, the grillmaster

Two portobello mushrooms, one burger patty, and lots of vegetables.  The vegetables were seasoned with salt, pepper, and EVOO. 

Friday, April 22, 2011

Who's got gas?

Thank goodness for planning ahead.  Let me tell you today's events.

This week is "Holy Week" for Mexico.  Much of the country is on vacation, inlcluding my employer.  It has been a relaxing week where I have been able to get all my runs in for my 1/2 marathon training plan, practice many many hours for my upcoming auditions and give daily mock auditions to friends, and I've been trying some new recipes this week.  As the week progresses, more and more businesses are closing for the holiday.  The streets are going to start looking like a ghost town as more and more people head out of town to be with family and relax at the beaches. 

One more little tidbit about living in Mexico.  All apartments and houses use gas - to heat water and for the stove/oven.  My current landlord insists on herself buying the gas for a common tank that my entire apartment complex shares.  It usually gets filled one time a month, but of course, it all depends on the use of all tenants in the building.  If we make it to the first of the month without it running out, the landlord automatically gets it refilled.  The only trouble happens when it runs out before the end of the month. 

Like today, for example. 

Yes, I woke up this morning and realized that the gas tank was empty.  No cleaning dirty dishes, no hot shower, and no cooking any food.  But the problem gets 10x worse in this situation -- the entire country is going on vacation and many businesses are closed so the possibility of refilling the gas tank is slim to none from today until Monday morning. 

That's right.  No gas until possibly Monday morning.  And it's only Thursday. 

This makes a sticky situation for someone who has ambitious cooking plans for the rest of the week.

Shea and I called the landlord around 9:30 AM.  She is out of town on vacation.  Since she is the one who calls for the gas company to come and also the person responsible for the 5000 peso bill, we didn't quite know what to do.  We called another gas company (Gas Pasa) hoping we could just "put it on a tab" and not pay anything, but still get the gas.  Heehee.  By 2:00 PM the gas company still hadn't arrived yet, so I wanted to head to Walmart to get some sandwich stuff.  We hop into the car and as we drive through a main intersection, Shea says he saw a gas truck coming from the other road.  I stop the car, he gets out and runs back towards the intersection.  The gas truck turns in my direction, but doesn't stop to talk with Shea.  He walks back towards the car and we continue on towards Walmart.  At the next intersection, we run into the gas truck again -- this time, they were making a stop!  Shea gets out and talks with them, eventually finding out that another gas truck was headed for my apartment at that exact moment.  We hightail it back to my place and find a different gas truck in front of my building.  We talk with these guys and learn that our landlord used to use this company and had an account with them, but not anymore.  If we want gas, we have to pay for it ourselves.  Bummer.  But they tell us the name of the gas company that is currently contracted for our building, but of course, they don't have the phone number.  They tell us that there had just been a HidroGas truck near the police station just a few blocks away from my place.  We book it to that neighborhood but couldn't find the truck.  We decide to head to Walmart but stop at an Oxxo store first to ask for the phone number of HidroGas.  While still in the parking lot, Shea calls the company to see if we could still put in a request for gas for today.  The woman says yes, they will send a truck out "ahorita" (NOW!).  More fast driving back to my place (still without the Walmart groceries).  I wait around in my apartment for the rest of the afternoon trying to practice.  Shea goes back to his place to also practice.  No sense in us both simply waiting for the gas truck to show up. 

But, it's 11:46 PM and I still don't have gas.  I'm going to call first thing in the morning and HOPE that the truck comes tomorrow.  While talking with one of the gas trucks we found out that the gas companies are working the rest of the week, so it looks like we might have some luck. 

Good thing I planned on us grilling out for dinner tonight!  I started marinating some chicken and vegetable kabobs yesterday.  The recipe is very tasty!! 

Not sure what tomorrow will hold............ lets pray for some gas. 

Sunday, April 17, 2011

Curried Couscous and Chicken

Before meeting Shea, I primarily ate vegetarian meals.  I never really liked the taste or texture of most meats and didn't really know how to season stuff.  I just ate a lot of tofu!  I purchased the "Quick fix Vegetarian" cookbook and quickly went through many of the recipes.  The following recipe is from this cookbook and is a favorite for Shea.  Of course, with some added chicken breast!!!  The flavor of the zucchini is wonderful against the curry powder.  We often wish there was more zucchini.  Don't skimp on it!

We made this again last week and used up the last of our couscous.  Such a bummer because I haven't seen couscous in stores for over a year down here.  Everyone enjoy this meal for us!

Curried Couscous, Chicken, and Vegetables

2-3 chicken breasts
salt, pepper, and coriander
EVOO

1 tablespoon EVOO
1/2 small onion, diced
2 small zucchini, halved lengthwise and thinly sliced crosswise
1/2 red bell pepper, diced or thinly sliced
1 clove garlic, minced
1 1/2 tablespoons curry powder, plus additional to taste
1/2 cup peas
1 (16 oz) can chickpeas, drained and rinsed
2 cups broth
1 1/2 cups couscous
salt and pepper to taste
fresh chopped cilantro

1. Season chicken with salt, pepper, and coriander.  Heat EVOO in a skillet and cook chicken until done, about 6 minutes each side.  Set aside.

2. While the chicken is cooking, heat EVOO in a large skillet over medium heat.  Add onions, red bell pepper, and minced garlic and cook until onions begin to get soft.  Add zucchini slices and cover with a lid, cooking for about 2 more minutes to get the zucchini softened. 

3. Stir in curry powder. 

4. Add peas, chickpeas, and broth and bring to a boil.

5. Stir in couscous and season to taste with salt and pepper.  If you want a spicier dish, add more curry powder, too.  Remove from heat, cover, and let stand for 5 minutes to allow the couscous to cook. 

6. To serve, fluff the couscous with a fork and transfer to plate.  Add chicken breast and cilantro.

Bon appetit!


Monday, April 11, 2011

Yay!

Unlike many trips to Walmart, today was such a good rewarding trip!!!!  Here are the things that they haven't had in stock for many weeks now, but today we found them all:

lemons (HUGE ones!)
monterrey jack cheese
garbanzo beans (I've never seen them at the walmart.  Usually they take an extra trip to another store)
sweet yellow onion (I've never seen them in Mexico in my 4 years living down here.  So excited!!!)
hummus

Too bad none of my planned menus for this week include lemons.  But next week will for sure be a super lemony week!

Thursday, April 7, 2011

Marinades

This is one of the original recipes that I wanted to put on this blog when I first started it.  It makes a ton of leftovers (when cooking for two people) and is just as good the second and third days. 

Salmon Marinade

1-1.5 pound salmon filet
lemon pepper seasoning, to taste
salt, to taste
4 garlic cloves, minced
4 tablespoons soy sauce
4 tablespoons brown sugar
4 tablespoons water
2 tablespoons + 2 teaspoons vegetable oil

1. Season salmon liberally with lemon pepper, salt, and minced garlic.  Rub into the fish gently.

2. In a small bowl, mix together the soy sauce, brown sugar, water and vegetable oil.  Stir until brown sugar dissolves.

3. Place salmon in large ziplock bag and pour marinade over it.  Refrigerate for at least 2 hours.  (I usually do 3-4 hours)

4. Preheat oven to 400 degrees.

5. Wrap the fish in aluminom foil.  Cut a 2 inch slit in the foil in the center.  Place fish on a baking sheet and bake for 20-25 minutes.

6. If you want to use the marinade, heat it with a little cornstach and serve over the fish.

Bon appetit!


Sunday, April 3, 2011

Presto Pesto!

Who doesn't love a good pesto sauce?  This is an easy, quick recipe with ingredients that I usually have on hand at any moment.  We used this for our homemade gnocchi (recipe and pictures to come soon), but put this on any pasta and enjoy a simple, light meal!

Spinach and Basil Pesto

1 1/2 cups spinach
3/4 cup basil
1/2 cup walnuts
1/2 cup fresh parmesan cheese
4 cloves garlic, minced
3/4 teaspoon salt
1/2 teaspoon pepper
1 tablespoon lemon juice
1/2 teaspoon lemon zest
1/2 cup EVOO

1.  Blend everything except the EVOO in a food processor.

2.  Slowly add EVOO while constantly processing. 

Stores in refrigerator for several days or can easily be frozen.

Bon appetit!

Saturday, March 26, 2011

The Little Chicken that Could

There is an amusing story about this next recipe.  If not amusing, it is, at the very least, educational. 

Just before Christmas vacation, we decided to try this whole chicken roast.  The recipe clearly states the amount of time necessary to cook but somewhere, somehow inbetween converting kilograms into pounds (time based on weight of chicken), I completely screwed up.  I underestimated how long we needed to cook it by about 1 hour.  (I did it for 55 minutes).  We undercooked the bird and ended up cutting off all the meat and then continued cooking in a skillet, thinking that would be faster.  I ended up spending my Christmas vacation with a terrible parasite.... and this cooking fiasco might be to blame. 

SO.  I knew the recipe had great potential and I finally got the nerve to try it again.  This time, I cooked it for just under 2 hours and it was perfect.  Well worth all the time spent marinating, letting the chicken rest at room temperature, the rub and seasonings, and the long amount of cooking time. 

Lesson learned:  make sure you cook the chicken long enough!  I had never cooked an entire bird before, so I didn't have knowledge of what a "normal" cooking time should have been.  Use the thermometer!

Peruvian Syle Roast Chicken

Buttermilk Soak
3 cups buttermilk
2 crushed garlic cloves
4 tablespoons white wine vinegar
2 tablespoons salt

Peruvian Style Rub
1 full head of garlic
1 teaspoon EVOO
4 tablespoons softened butter
1 tablespoon paprika
1 teaspoon turmeric
1 teaspoon cumin
1/2 teaspoon salt

3-4 limes
3-4 springs fresh thyme, destemmed and chopped
1/2 cup chicken stock
3-3.5 pound whole chicken, rinsed and tidied up

1. Mix together all ingredients for the buttermilk soak.  Soak the chicken in the buttermilk brine for 3-4 hours.  I place the chicken in a large ziplock bag and then pour all the liquids over it.  Place in refrigerator and turn occasionally.

2. Roast the head of garlic. Slice off the top of the head, exposing all the cloves. Drizzle the oil in between all the cloves, and wrap the whole thing up in foil. Bake for about an hour at 350 degrees.  (I use my toaster oven).

3. Squeeze all the tasty roasted garlic out into a small mixing bowl.  Add the butter and spices, and the juice of one of the limes, and make a paste.
4. Remove the chicken & brine from the refrigerator.  Rinse the chicken and pat it dry.  Rub the paste under the skin of the breast and thighs and then over the entire chicken. Tuck one or two quartered limes in the cavity and truss the chicken loosely.
5. Allow the chicken to come to room temperature, and the paste to season the chicken, for about 30 minutes.
6. Preheat the oven to 375 with the rack in the bottom third of the oven.
7. Slip in the chicken, back side down, onto a roasting pan and then place in the oven.  (In the states, I will probably use my Dutch Oven, but for down here, I bought an aluminom roasting pan and placed it on a baking sheet.)
8. The chicken needs to cook for a long time.  The only reliable test is a thermometer reading of 160 degrees.  I started checking mine at the one hour mark.  Mine cooked for 1 hour and 55 minutes.
9. Remove the chicken and juices from the roasting pan and put it on the stove in a large skillet with deep sides.  Over high heat, add thyme and 1/2 c chicken broth, then spoon the broth over the chicken. Allow the bird to rest for 10 minutes, then quarter and serve.

Bon appetit!
Buttermilk soak

Peruvian style rub

Letting the chicken rest at room temperature

Out of the oven

In the pan with thyme and chicken stock

Lots of meat!